Fall Harvest
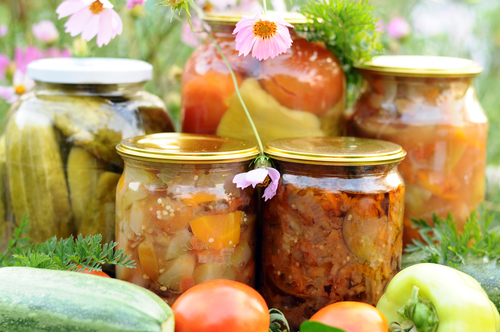
Canning your fall harvest from the greenhouse is one of the best parts of greenhouse gardening for many gardeners. Storing those fresh fruits and veggies signifies the culmination of a long and ‘fruitful’ growing season. The love of fresh produce is a strong motivating factor for many gardeners. It’s why we spend hours pulling weeds, watering, and caring for fledgling plants month after month.
Sometimes, despite our best efforts, the garden crops tend to get ahead of us. There are only so many hours in the day, and when other responsibilities encroach on your treasured gardening time, you can find yourself stuck with a boatload of work. Here are few ideas to help you make the most of those busy gardening moments.
Canning
One of the inevitable side effects of a love for gardening is hours spent in the kitchen preparing all those fruits and veggies for storage. Until a few years ago, I simply froze all of my garden veggies, but then I decided to give canning a try. Boy, am I glad I did! If you are new to canning, these time saving tips might prove to be very valuable. Give a few a try and see what a difference the extra effort can make!
1. Invest in a food processor. Veggies are ready for canning in seconds and the entire machine cleans up with a rinse in hot soapy water. My fingertips are very thankful that I won’t be scoring them repeatedly while slicing up cucumbers, tomatoes, carrots, and beets this year.
2. Buy a pressure cooker. Although most pressure cooker manuals do not include any instructions for pressure canning quarts and pints, but the FDA encourages home gardeners to use pressure canning for all low-acid foods, like beans and carrots. You can find pressure canning time tables and instructions online if your pressure cooker doesn’t come with canning instructions.
3. Compost your food scraps. Those snap bean ends, tomato cores, and corncobs make great fertilizer for next year’s crops. Mix your layers of food scraps with coffee grounds, grass clippings, and leaves to create the richest compost. Be sure to water it well and turn it over often to increase airflow for better decomposition.
4. Enlist help. Recruit your kids, spouse, or friends to help you pick, clean, prepare and can your crops. The work will go twice as fast and you can reward them a few jars of the finished products.
5. Always label your jars. You may think it’s a no-brainer that jar contains this year’s beans, but in 12 months, your memory may not be so clear. Sometimes jars get missed from year to year and labeling them with the date canned helps keep you from wasting food and getting spoiled jars.
6. Stock up. Always buy an extra set of jars and several boxes of fresh lids to keep on hand. It can be frustrating to have a hot jar of produce ready for processing and realize you are out of lids or bands.
Having canning supplies handy during harvest time means that you can keep more of your food fresh for use during the off-season. Here is a list of supplies that will help you successfully can your fresh produce!
- Boiling-water canner – Basically just a big pot with a tight fitting lid, mainly used for canning fruits or high-acid vegetables.
- Pressure canner – Similar to a pressure cooker, the lid locks down to keep steam in. This canner is great for vegetables and low-acid foods.
- Canning jars – Commonly called Mason Jars, these are the glass jars that come with metal screw on lids. They create very tight seals and are perfect for canning just about anything. You can choose from pints, or quart-sizes, and regular or wide-mouthed varieties.
- Lids and bands – Lids, sometimes known as “flats,” should be new and never reused because they may not seal properly the second time. Bands thread onto the jars to hold the lids in place during the canning process. These can be removed after a pressure seal has formed and the jars cool for 12-24 hours.
Canning your fruits and veggies from the greenhouse can be an immensely rewarding experience. Canning takes a lot time, and the lengthy process is often daunting for many gardeners who are new to canning, but taking a few time saving tips can help make your first canning season a pleasant one.
Pumpkins
Halloween is past, yet the pumpkins are still plentiful. You’ve decorated your yard, made a pie or two, and given away more pumpkins than you can count, yet there are still more lying around in the garden! What’s a gardener to do with all those left-over pumpkins? In a good year, a single pumpkin vine can yield more than a dozen pumpkins ranging from tiny to gigantic.
Pumpkins have a two-fold purpose for gardeners. They are great for fall decorations and quite tasty as well.
Directions for Storing Pumpkins
Pumpkins can be pressure canned like most other low-acid vegetables and stored for the winter months. Canned pumpkin is good for 3-6 months. To prepare the pumpkin:
- Cut open pumpkin and de-seed the shell, including removing any stringy portions of the pulp.
- Cut pumpkin up into strips or chunks.
- Place strips on a cookie tray, rind side up.
- Add 1 cup of water to the tray and bake at 200 degrees for an hour. (The rind should peel off easily by hand or with a spoon or dull knife, but the pumpkin should not be mushy)
- You can also cook the pumpkin in a covered dish in the microwave for 20 minutes, if you prefer. (Don’t’ forget to add the water.)
- Remove from oven/microwave and allow to cool.
- Remove rinds and cut the flesh into 1-2-inch cubes. (discard the rind)
- Clean and heat canning jars and rings.
- Place cubes into hot jars
- Fill jar with hot water, leaving 1 inch of head space
- Clean and dry jar rims
- Screw warm lids and rings on jars
- Place jars in pressure canner and bring to 10 lbs. pressure
- Time jars for 65 minutes for pints, and 75 minutes for quart jars.
- Allow to cool and seal before moving jars
Freezing Pumpkin
Alternately, you can also freeze your pumpkin for up to 4-6 months. Follow steps 1 through 7 above, then place cubes into a food processor and puree the pumpkin. Pour the puree into freezer jars, seal and store.
Please note: It is not considered safe to can pumpkin puree at home, nor can you freeze pumpkin chunks. http://www.pumpkinpatchesandmore.org/pumpkinprecautions.php
Pumpkin Recipes
Putting all that pumpkin-y goodness to use if the best part of growing your own pumpkins! Here are a few tasty pumpkin recipes to try out!
- Pumpkin Cream Cheese Pie: http://www.pumpkinnook.com/cookbook/pumpkincreamcheese.htm
- Pumpkin Chip Muffins: http://www.pumpkinnook.com/cookbook/recipe34.htm
- Pumpkin Stew: http://www.pumpkinnook.com/cookbook/recipe35.htm
- Pumpkin Tomato Basil Soup: http://www.pumpkinnook.com/cookbook/recipe30.htm
- Roasted Pumpkin Seeds, in various flavors: http://www.pumpkinnook.com/cookbook/recipe03.htm
- Pumpkin Chili #2: http://www.pumpkinnook.com/cookbook/recipe11.htm
- Pumpkin Roll Out Cookies: http://www.pumpkinnook.com/cookbook/recipe24.htm
- Honey Pumpkin Pie: http://www.pumpkinrecipes.us/honey-pumpkin-pie.html
- Pumpkin Pancakes: http://www.pumpkinrecipes.us/pumpkin-pancakes.html
- Stuffed Pumpkin (cooks in the pumpkin!): http://www.pumpkinrecipes.us/stuffed-pumpkin.html
- Pumpkin Chili: http://www.pumpkinrecipes.us/pumpkin-chili.html
- Libby’s Pumpkin Pie (just substitute your fresh pumpkin puree for the canned): http://www.verybestbaking.com/products/libbys/
- Old Fashioned Soft Pumpkin Cookies: http://www.verybestbaking.com/recipes/detail.aspx?ID=32364
- Pumpkin Roll: http://www.verybestbaking.com/recipes/detail.aspx?ID=32372
- Quick Pumpkin Pudding: http://www.verybestbaking.com/recipes/detail.aspx?ID=28454
- Iced Pumpkin Cookies: http://www.verybestbaking.com/recipes/detail.aspx?ID=5243
Overripe Cucumbers
One vine can produce tons of cucumbers, long into the growing season. The leafy vines often hide growing cucumbers from your sight, resulting in overgrown, or overripe cucumbers. Overgrown cukes are long, large, and often yellow. The flesh is porous, less crisp than young cucumbers, and the seeds are large and plentiful. Many cooks will tell you these cucumbers are not suitable for pickling or relish making. So, what are you to do with these garden giants? Well, you can make them into a sweet treat. Pickled Cinnamon Cucumbers taste a lot like candied apples and the rich cinnamon flavoring makes them immensely appealing as an after-dinner treat.
They take about 3 days to process and the finished product is jar filled with richly colored red rings of sweetness with a cinnamon stick in the center. These jars are nice enough to give away as gifts or enter into the county fair. You can find the original recipe here: http://www.scrapbookflair.com/oklahomadawn/Cinnamon_Cucumber_Rings/Page1 .
Cinnamon Cucumber rings
2-3 gallons cucumber rings
8 1/2 qts. cold water
Red food coloring
1 tsp. alum
2 c. water
8 cinnamon sticks
2 c. pickling lime
1 c. vinegar
2 c. vinegar
10 c. sugar
1 pkg. red hot candy
Mix 2 cups pickling lime and 8 1/2 quarts cold water. Pour over cucumber rings. Let stand 24 hours. Drain. Wash and put in cold water. Let stand 3 hours. Drain. Mix 1 cup vinegar, red food coloring, alum, and add enough water to cover. Simmer 2 hours. Drain.
Mix 2 cups vinegar, 10 cups sugar, 2 cups water, 1 package red hot cinnamon candy, 8 cinnamon sticks. Bring to boil. Pour over cucumber rings. Let set overnight. Drain off; heat and pour back over cucumbers. Do this for 3 days. On 3rd day, pack rings in jars; seal.
Another option is to go ahead and make them into pickles with a special recipe that calls for overripe cucumbers. This recipe includes brown sugar and vinegar, making an unusual, yet palatable pickle. The original recipe for these pickles is here: http://www.cooks.com/rec/doc/0,1636,149170-226205,00.html .
Mother’s Ripe Cucumber Pickle
Large ripe (yellow) cucumbers
2 lb. brown sugar
1 pt. cider vinegar
2 tbsp. whole cloves
2 tbsp. stick cinnamon
Cut cucumbers in half lengthwise. If very large you may need to cut crosswise also. Cover with alum water (2 teaspoons alum to each quart of water). Heat gradually to boiling, then let stand until clear. Remove cucumber from water and chill in ice water.
Make a syrup by boiling 5 minutes the sugar, vinegar and spices (tied in muslin). Add cucumbers; cook 10 minutes. Put cucumbers in jars and pour syrup over them.
Books on Canning:
Preserving the Harvest
The Beginners Guide to Preserving Food at Home
Keeping the Harvest: Home storage of fruits and vegetables
Back to our home page